Node Instance's Properties/Parameters
MOV.AI Flow™ enables you to easily configure the properties of a robot’s behavior inside a flow without have to edit code.
Here’s an example of how easy it is to customize a robot’s behavior in a specific flow using MOV.AI Flow.
To customize the distance that the robot travels –
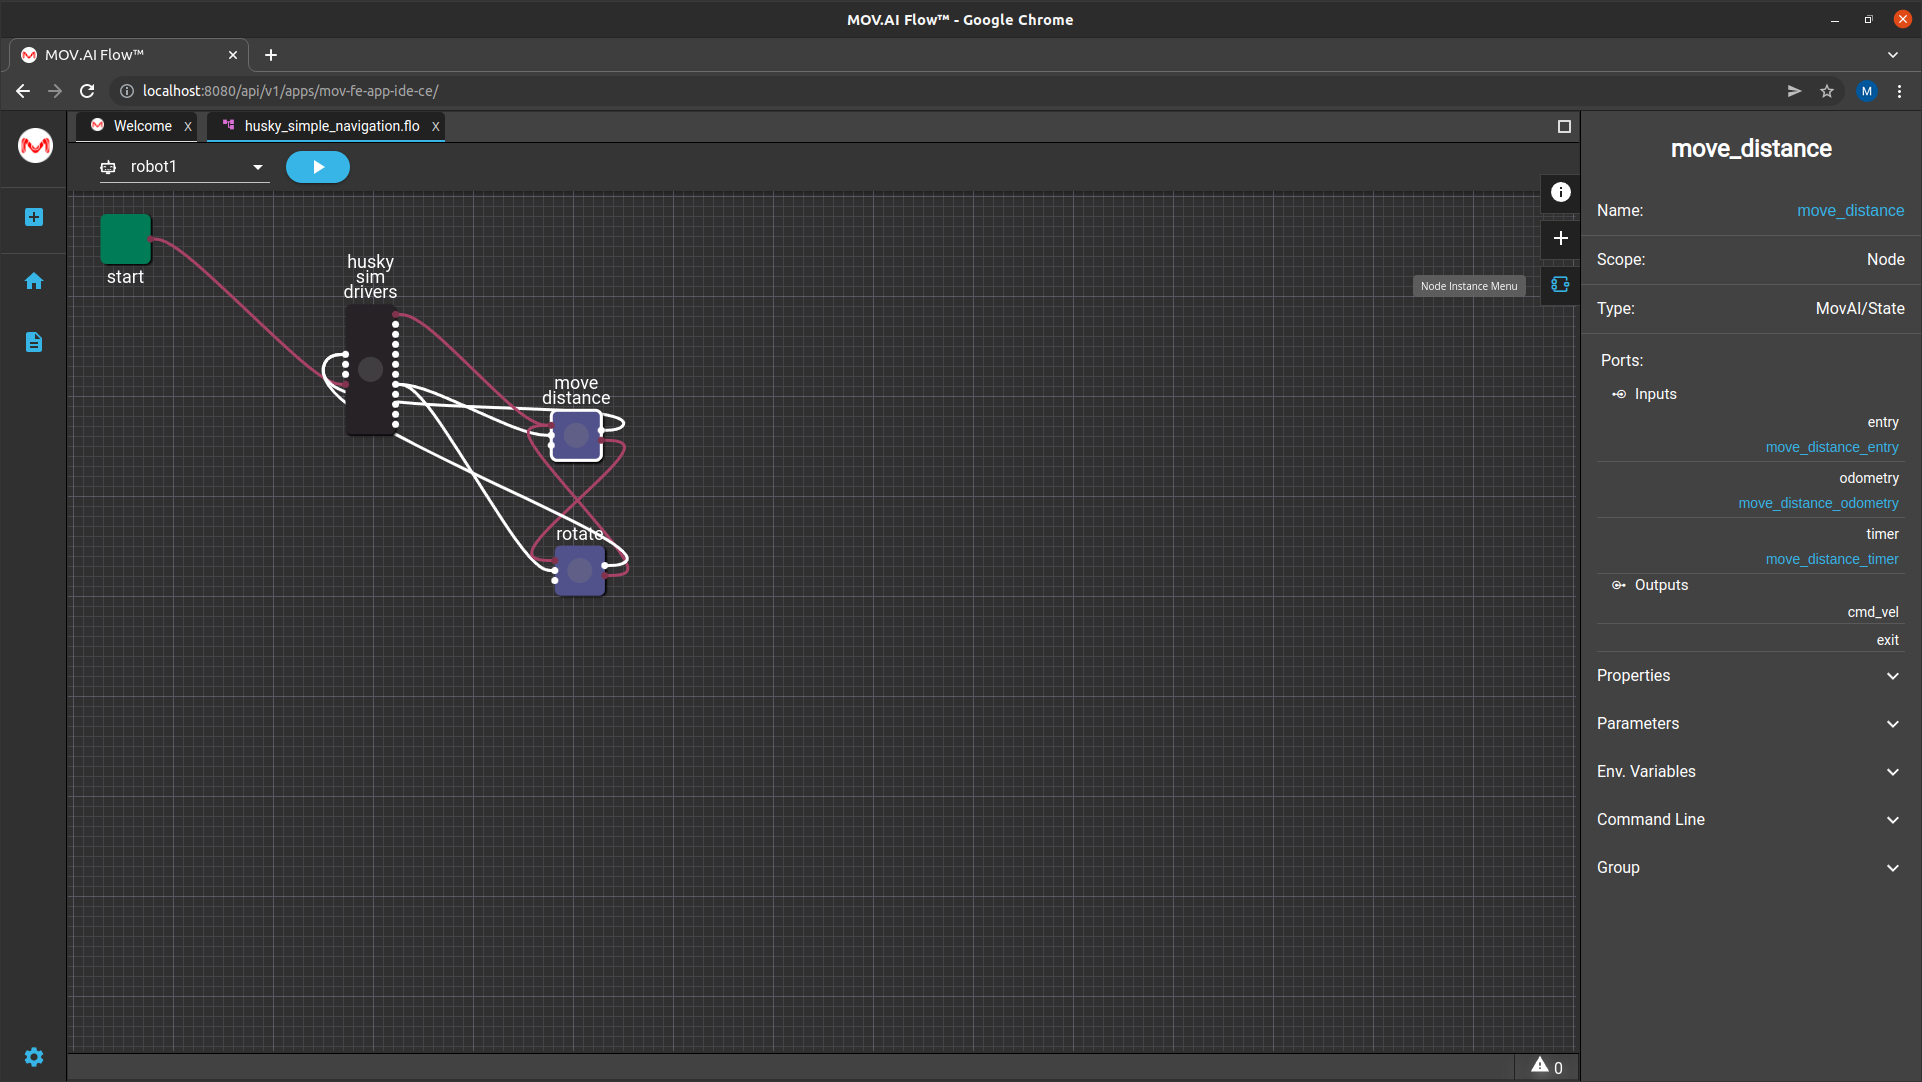
- Open a Flow (for example the Simple Navigation: Husky demo).
-
Click on the
 button on the top right of the flow diagram to expand the properties pane of this flow on the right.
 -
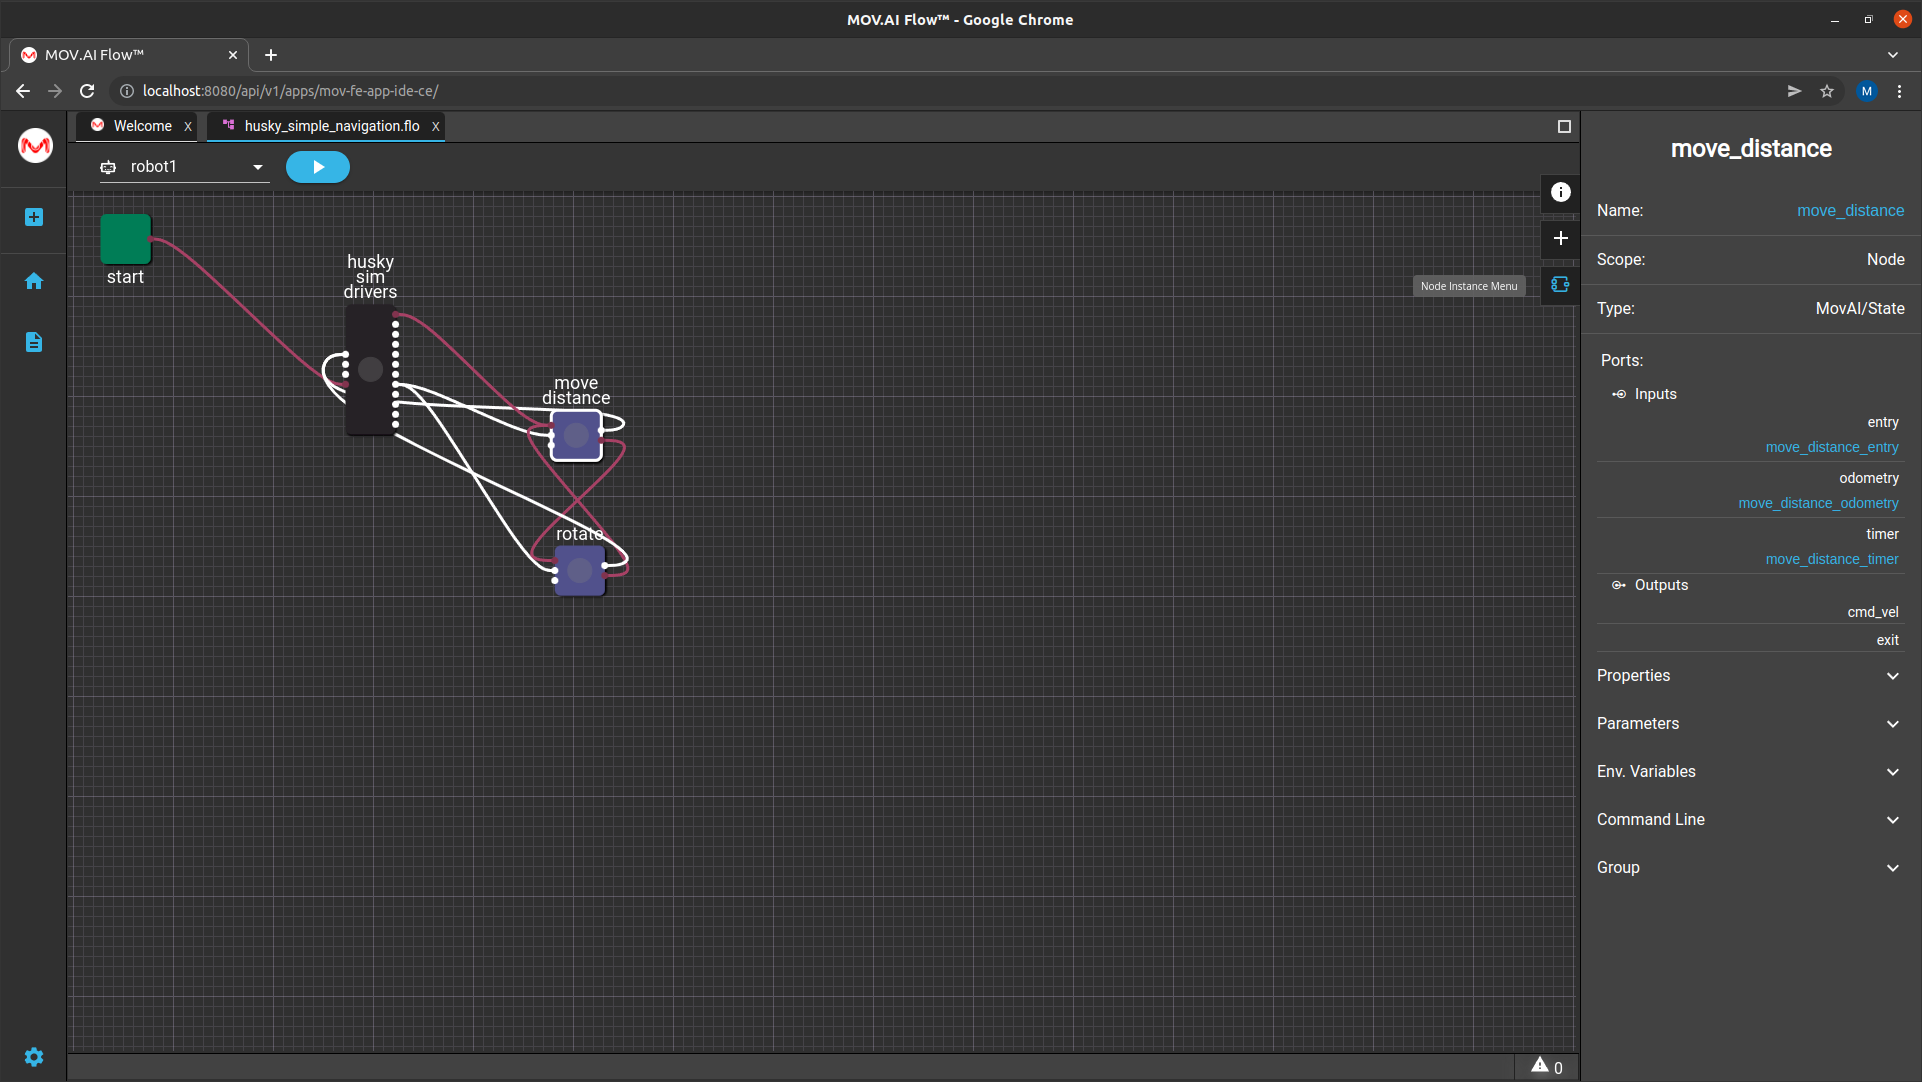
Click on a node n a flow to display its properties in the right pane, For example, click on the move distance node, as shown below –
- Click on Parameters to expand it to show all the customizable parameters provided for this node. For example, as shown below –
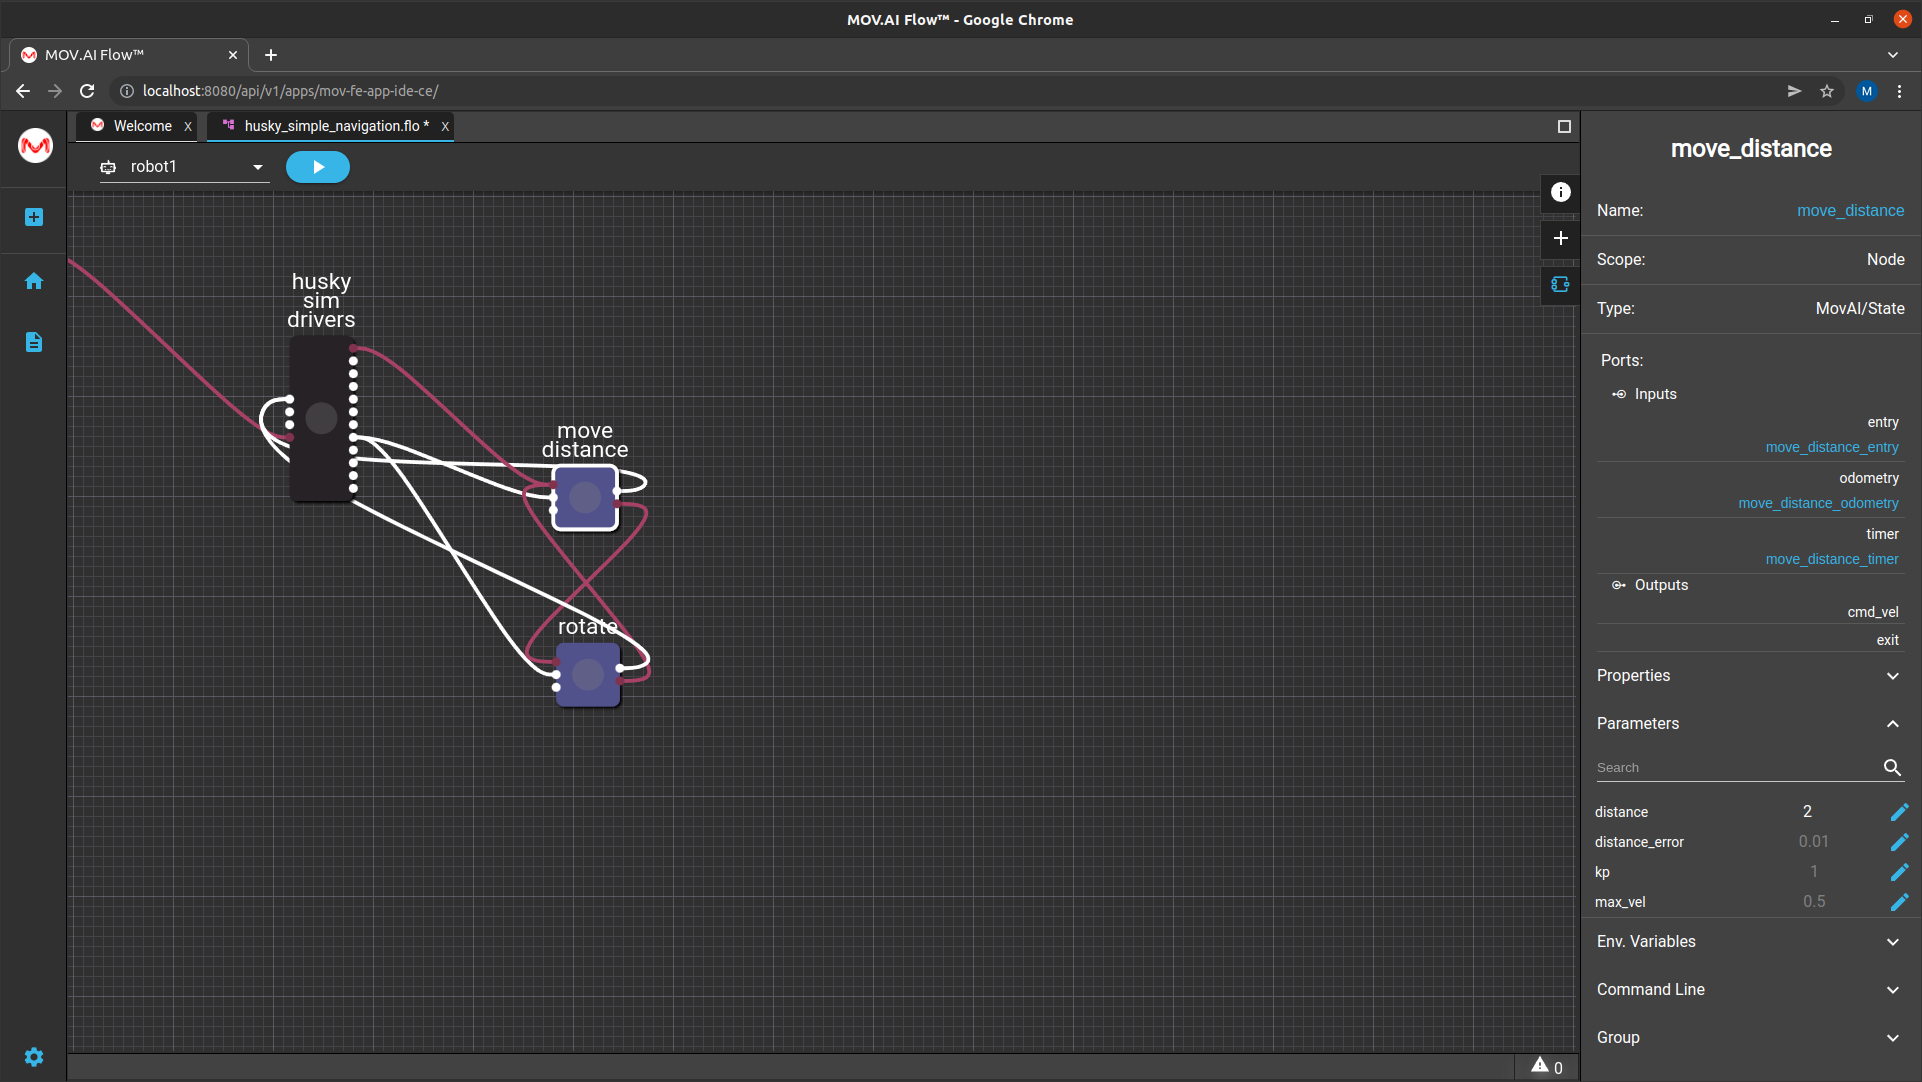
This example shows that currently the value of the distance property is 2, meaning that the robot will travel 2 m.
- To modify this distance, click the Edit
 button next to the distance property to display the following –
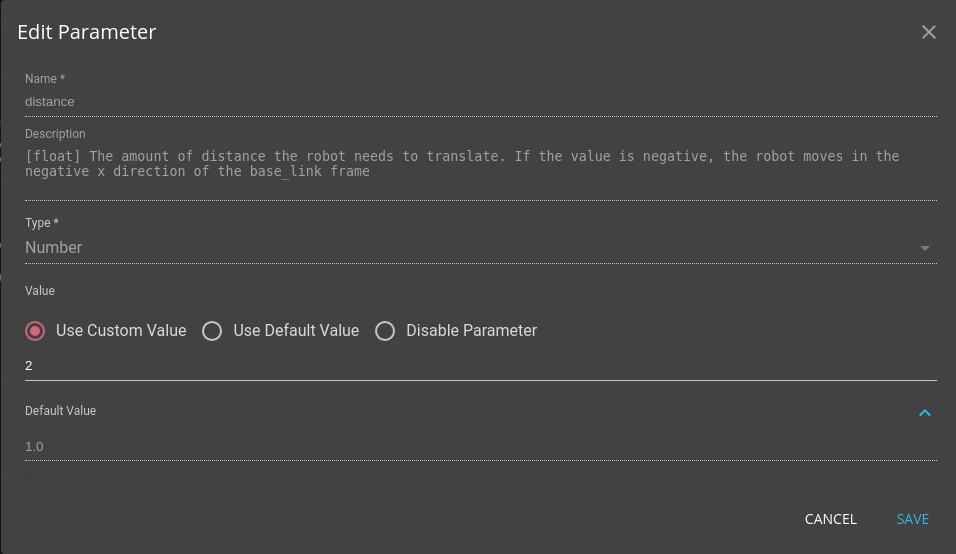
This window describes the purpose of this property. For example, the description above reads –

- This page also enables you to modify the configured distance value.
To do so –
- Make sure that the Use Custom Value option is selected.
- Change the number in the Value field to specify the distance that you would like the robot to travel (for example, 1 m) and then click SAVE.
The next time you click the Play  button, the robot will travel 1 m in each direction of the square.
MOV.AI saves you the trouble of having to find the required parameter in a yaml file or some other type of large configuration file.
Node Instance Properties/Parameters in a Flow
When you click on a node in the flow diagram, its properties are displayed in the Properties pane on the right. The type of information in the Properties pane differs for each type of node. However, the following describes some of the typical properties that may appear for most nodes.
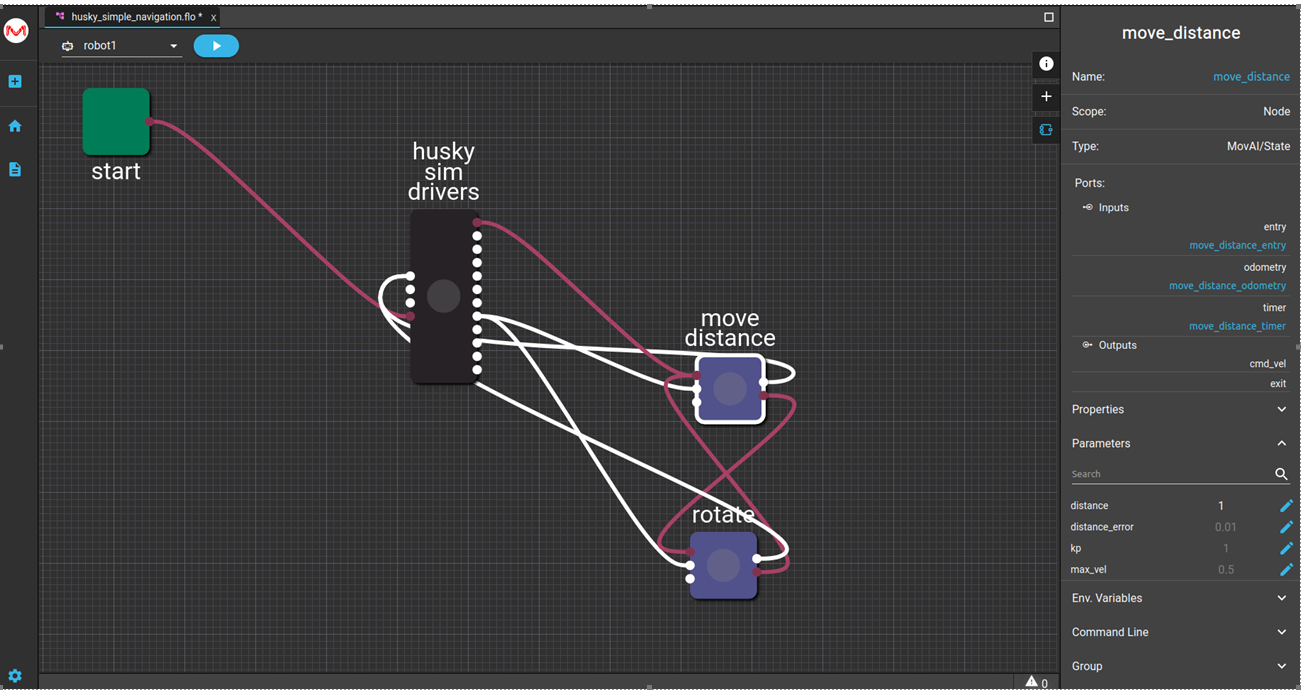
- Node Name – The top center of the page shows the name of the node. For example, move_distance.
Details Section
- Name – Shows the name of the Node Template from which this node inherited its definitions. Clicking on this name opens the node template in the editor.
- Type – Shows the type of the node, such as MOVAI/Node or ROS/Node. You may refer to Node Types for more information.
Ports Section
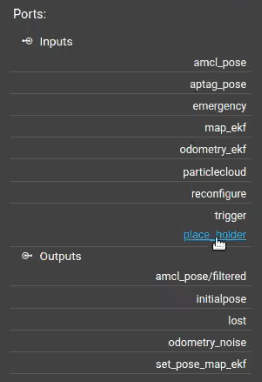
Each node consists of input and/or output ports that enable communication (topics, services and so on) between the other nodes in MOV.AI flow and subflows. You may refer to I/O Configuration for more information.
If a callback has been defined to be triggered by one of these ports, then its name appears under the input or output port name. For example, the trigger input port below has a callback named place_holderthat is triggered when this node receives input. You can click on this callback's link to display its Python code.
Properties Section
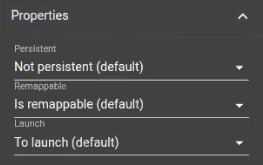
All nodes have the following properties. Mark the relevant checkboxes, as follows –
- Persistent – After this node is launched it remains active throughout the entire execution of this flow.
- Remappable – Allows the ports of the note to be remapped.
- Launch – Controls whether the node is launched or not (disabled).
The word (default) appears to indicate that this is the setting from the nodes template and has not been modified for this node in the flow.
Parameters Section
The parameters in this section enable you to control/modify the behavior of the node.
To modify the value of a property, click the Edit ![]() button next to the property. The following displays –
button next to the property. The following displays –
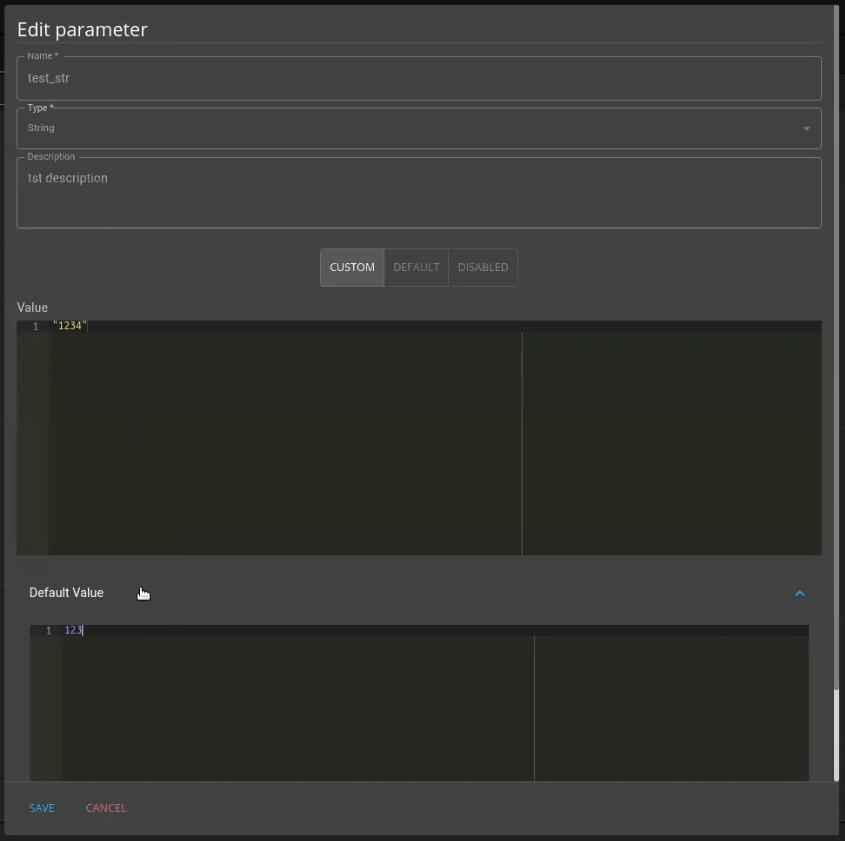
You can also click on any of the display parameters, such as test_str, to see the description of what it does and to modify its value.
The top part of the Edit parameters window shows the name, type and description of this node as defined in the node template from which it was instantiated. These cannot be edited.
Selecting the CUSTOM radio button indicates that you have modified the default value that was assigned by the node template from which this node was instantiated.
Selecting the DEFAULT radio button indicates that this note should be reset to the default value that was defined by this nodes template.
Selecting the DISABLED radio button since this value to none.
The Value section enables you to enter a new value. After you have entered a value, click the SAVE button.
The Default Value section shows the default value that was defined in the node template from which this node was instantiated.
Parameter values that have been edited (such as distance, as described above) appear white in the Properties pane. If the default parameter values that was defined in the node template has not been changed, then its value appear grayed out in the Properties pane.
You may refer to the Node Parameters section of the I/O Configuration window to see the definition of these parameters in the node's template.
Environment Variables Section
The variables in this section enable you to defines the Linux environment variables that determine how the node is launched. This enables you to set these variables without using a terminal.
To modify the value of a property, click the Edit ![]() button next to the property.
button next to the property.
You may refer to the Environment Variables section of the I/O Configuration window to see the definition of these variables in the node's template.
Command Line Section
The command line arguments in this section enable you to define the command line arguments that are passed when the node is executed. For example, python3-nodename command-line-argument1.
To modify the value of a property, click the Edit ![]() button next to the property.
button next to the property.
You may refer to the Command Line section of the I/O Configuration window to see the definition of these arguments in the node's template.
Groups Section
The options here enable you to define that nodes belong to specific groups and then to show and hide these groups.
Subflows
Clicking on a subflow node in a flow displays the following properties pane on the right –
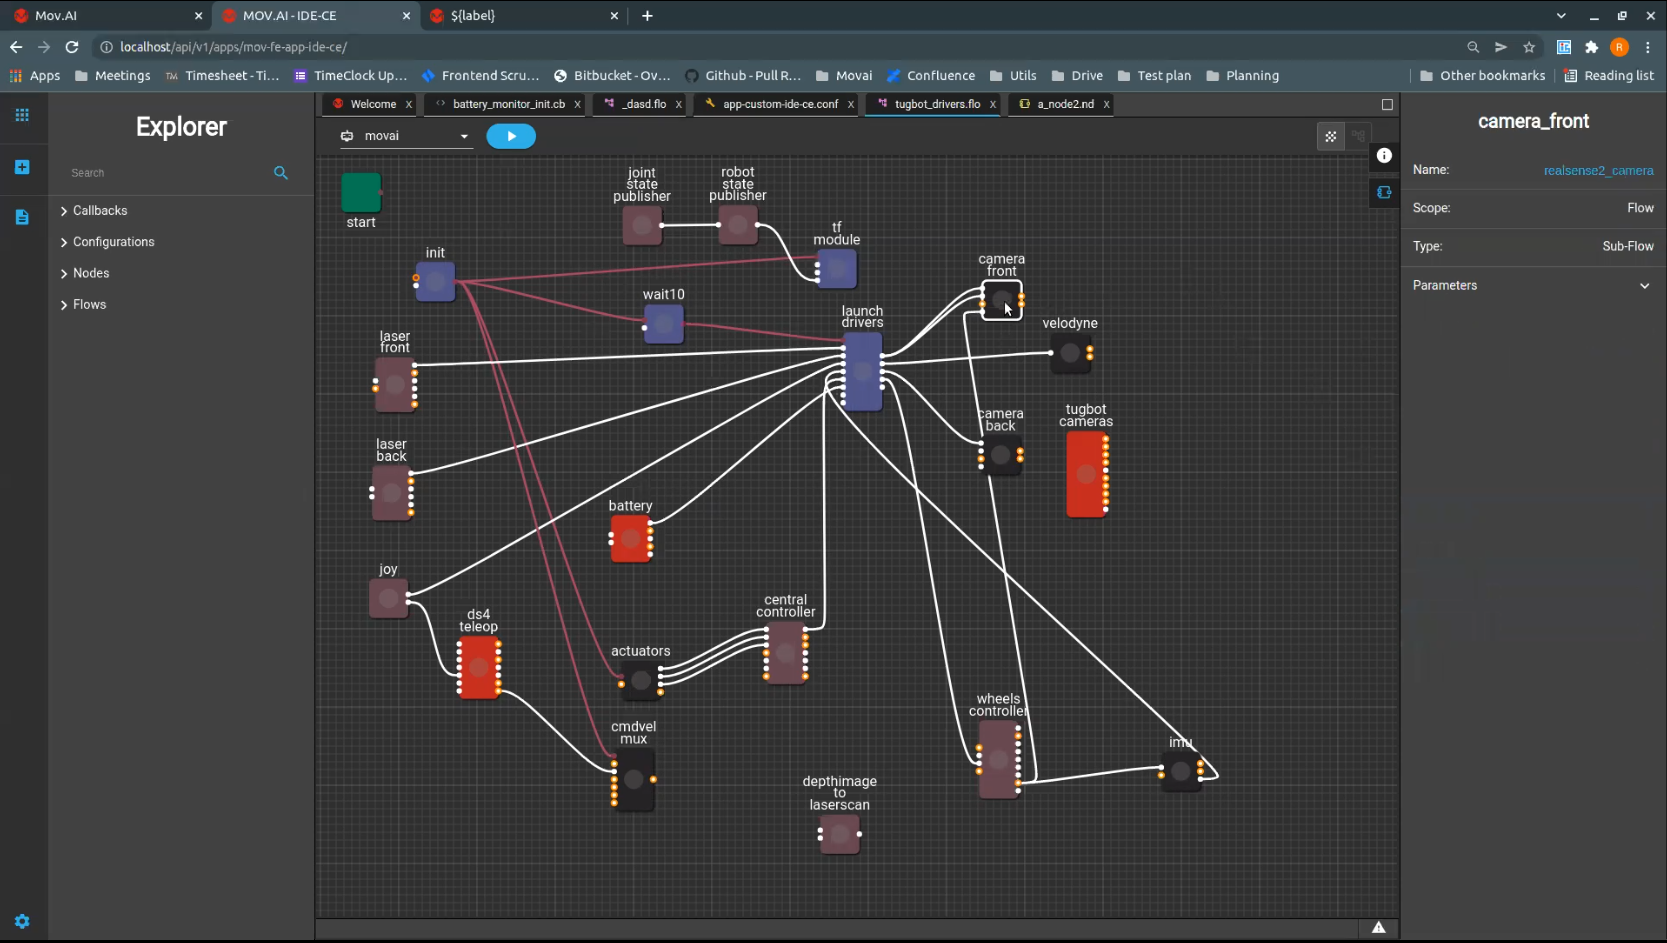
Subflow Name – The top center of the page shows the name of the subflow. For example, camera_front.
- Name – Shows the name of the subflow. Clicking on this name or double-clicking on the black subflow in the flow opens the subflow of additional nodes that it represents.
- Type – Shows subflow.
- Parameters – Enables you to add edit or delete parameters for the subflow.
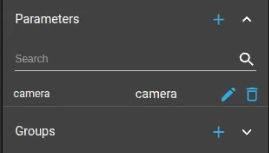
Links
Clicking an a link in a flow displays its properties, as shown below –
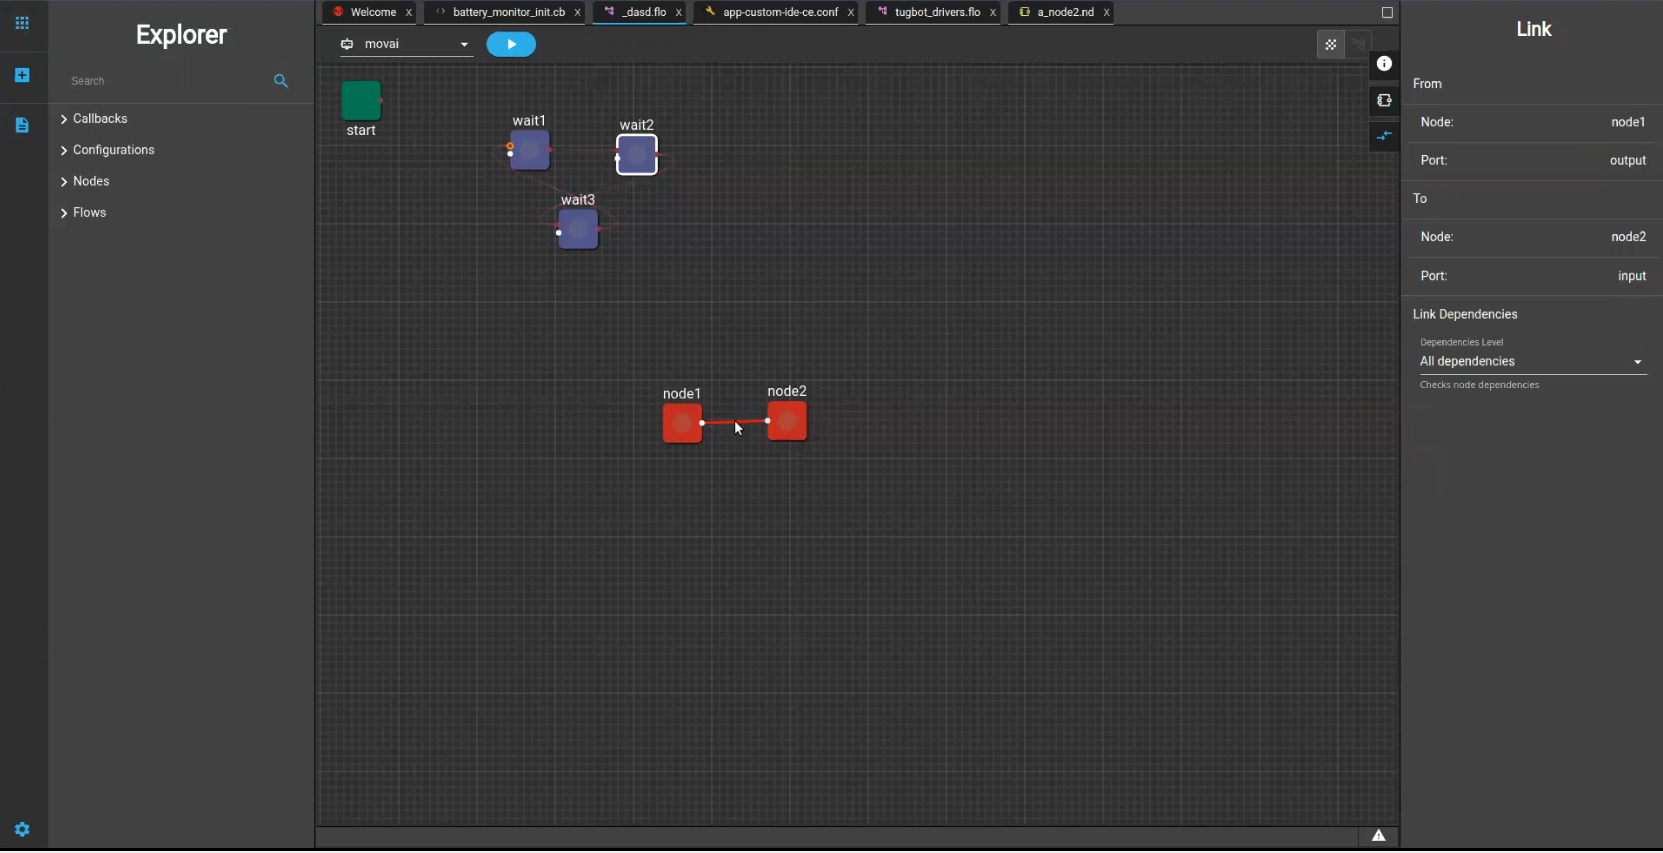
The Properties pane shows the node and port from which and to which the link is connected. The Link ![]() tab appears in the top right corner of the page. The selected link is displayed red, as shown above.
tab appears in the top right corner of the page. The selected link is displayed red, as shown above.
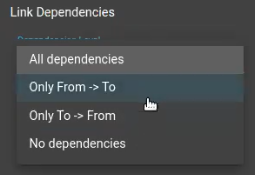
Link Dependencies
GGG
Updated 9 months ago
